source: www.youthwork-practice.com | 2000 Games, Devotions, Themes, Ideas and more for Youth Work
only for private using
A decorative tin relief
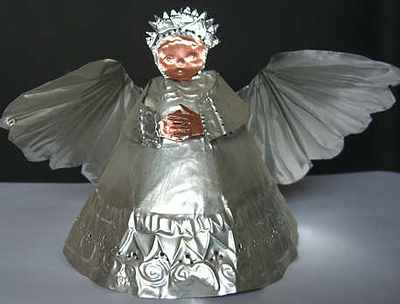
Anyone who believes that there are only nice antiques available to buy at the fleas market has not worked with tin foil before. Tin has its own magic and its matt sheen makes it the ideal material for tender elegance. You just need a steady hand and a feel for shape and you can start straight away.
Craft materials
- Straight engraver and curved engraver with a spherical head
- Rounded and straight scissors
- Oil remover (is available in trade stores as powder or fluid)
- Tin patina
- Glue
- Tracing paper
- Pencil
- Ruler
- Some soft dusters or cut-off materials
- Household cotton wool
- Sticky tape
- Sandpaper
- Tin foil (hard tin), 0,1 mm thick (available in craft stores on a roll)
Instructions:
Transfer your chosen motive onto tracing paper first of all. Lay the tin foil with the front side facing upwards (can be recognised by the lighter colour) on hard cardboard. Stick the tracing paper onto the cardboard with sticky tape.
With a straight engraver transfer the motive with light pressure onto the foil. Before you remove the tracing paper make sure that the motive has been fully transferred onto the foil.
Then you can place a soft duster or piece of material between the foil and cardboard to provide a more pliable underlay, then you push the contours of the motive with a round head engraver (without the details such as leaf veins or texture) through. Work with the same amount of pressure from left to right using the engraver like a pencil and using the index finger of the other hand to lead the tin foil.
Once you have pushed through all of the contours you should turn the foil over and press the outlines through once again, however this time approx. 1 mm inside of the outlines which already exist. Turn the foil over once again and smooth out the indents with the fingertips directly next to the contour lines. Go over the first line again, a sharply defined contour edge should now be present on the foil.
Before you can start modelling the finer shapes you should lay another layer of cloth between the cardboard and foil with the front side of the foil on the material. The soft lines should be worked on with the round headed engraver and the finer contours with the straight engraver. Turn the foil over and using the curved engraver and the edges, push in convex lines. Then press on the background until it sits flatly on the underlay. You will achieve an interesting effect if you press little dots along all of the outside lines with the point of the straight engraver.
To avoid dents in the convex forms you can fill them out with artificial resin or carefully fill them with the artificial resin spatula. Smooth the lines and leave them to dry before the next stage of work.
Before the patina is applied the surface must be thoroughly cleaned and free from oils. For this special powders are available which can be applied with a moist cloth and washed off under a flowing tap. Leave the piece to dry thoroughly and wipe a cotton wool ball dipped in patina evenly over the surface until it almost turns black. Once the patina is dry polish it with a soft cloth. The tin relief picture is now finished. It is slightly more complex to produce but for your efforts you will have a wonderfully elegant decorative relief.
[ © www.youthwork-practice.com | 2000 Games and Ideas for Youth Work ]


