source: www.youthwork-practice.com | 2000 Games, Devotions, Themes, Ideas and more for Youth Work
only for private using
Sand pictures
A stencil can help achieve pretty patterns; create a wall decoration or decorate objects
Material:
- A stencil
- A bowl
- PVA glue
- Wood glue
- Silver sand or fine beach sand
- A soft brush
- Clear polyurethane varnish
- A small paintbrush
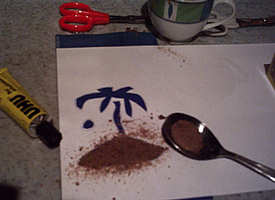
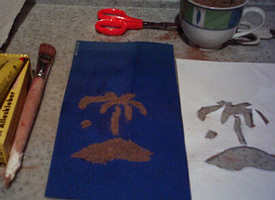
Stencils and sand can be used on lots of different surfaces. The best way to achieve a nice effect is with fine sand. Silver sand from a DIY store is ideal or simply take some sand home with you after a trip to the beach. You must make sure that the sand is thoroughly dried before using it. In order to apply the sand to the chosen surface, use glue which is not too fluid such as PVA glue or wood glue for example. The glue must be capable of holding the form of the stencil. Apply a layer of glue which is not too thin otherwise it tends to dry out before you have the chance to pour the sand over it. Once you have finished stencilling, apply a coat of varnish as a seal to hold the sand together. The varnish may lead to a slight in change in the colour of the sand.
The best motifs with sand are achieved on surface with a fine and natural colour. Eye-catching results can be achieved on surfaces with a strong base colour. For additional effects, use coloured varnishes to seal the sand motif.
How to do it:
-
Place the stencil onto the surface. Apply quite a thick layer of glue into the stencil with a stencil brush. Wash and dry the brush.
-
Remove the stencil carefully and pour a thin layer of sand over the wet glue until all of the glue is covered. Instead of using fine sand for the stencils you can also try out other materials. Glitter, which is available in lots of different colours, can be used in the same way. Use this to give surfaces such as a paper light shade the required amount of shine, to make gift cards or wrapping paper.
-
Shake the excess sand back into the container and do not touch the stencilled area until the glue has dried completely.
-
Brush any excess sand from the stencilled area with a light brush. Seal the area with a protective coat of polyurethane varnish. In order to avoid glue getting under the edges of the stencil, use a weight to weigh down the stencil.
[ © www.youthwork-practice.com | 2000 Games and Ideas for Youth Work ]


